Installing new tile is one of the most effective ways to update a bathroom, elevating its visual appeal while providing a durable, water-resistant surface. However, the longevity and final appearance of a tiled surface depend heavily on the work completed long before the first tile is set in mortar. Neglecting surface preparation frequently leads to cracked grout, loose tiles, structural movement, and concealed moisture damage over time.
Proper preparation requires a systematic approach, starting with the complete removal of old wall and floor coverings down to the framing. Ensuring that subfloors are rigid and deflection-free, establishing plumb framing, and applying robust waterproofing membranes create a stable substrate that can support heavy stone or porcelain tile. Understanding these essential preparation steps helps homeowners protect their investment and achieve a flawless, long-lasting tile installation.
Stripping Existing Materials and Inspecting the Framing
A successful tiling project begins with a clean, structural slate. Laying new tile over outdated vinyl, existing tile, or compromised wallboards creates height issues and risks hiding underlying structural flaws.
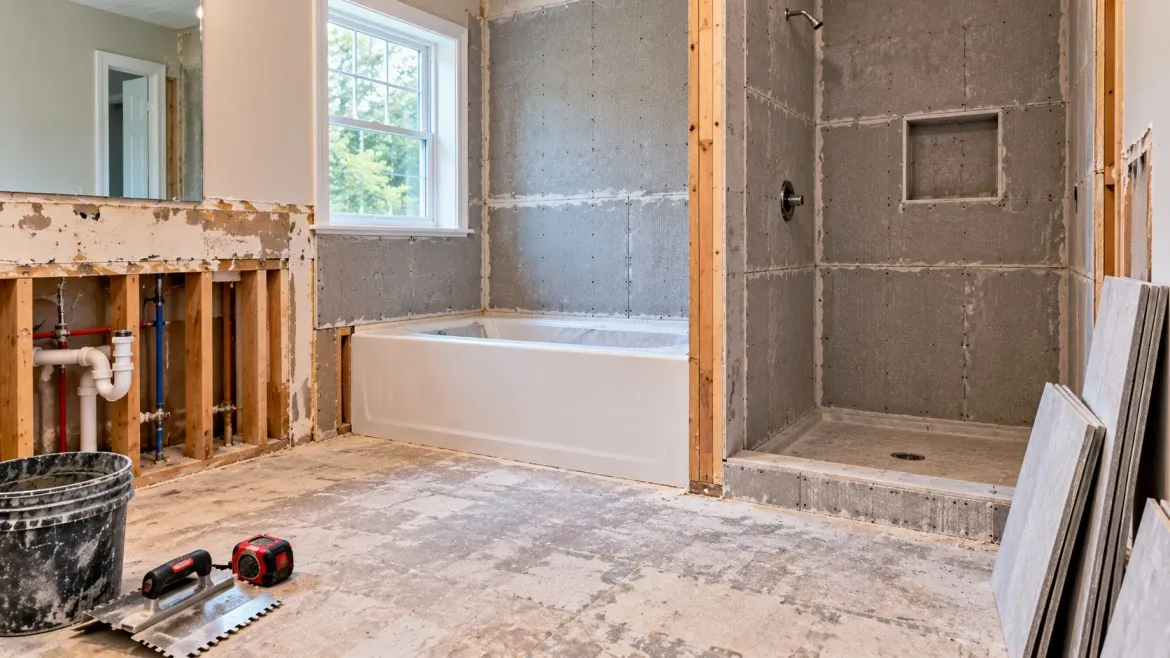
During demolition, all wall coverings and old flooring should be removed down to the wall studs and floor joists. Once the framing is exposed, inspecting for signs of rot, mold, or insect damage is crucial, particularly around plumbing fixtures like tubs, showers, and toilets. Any damaged wood framing must be replaced or reinforced before proceeding. Additionally, checking that studs are straight, square, and plumb is essential, as even minor bows in wall framing can cause noticeable lips or uneven gaps when laying large-format tiles.
Ensuring Subfloor Rigidity and Deflection Limits
Tile and grout are rigid materials with very little flexibility. If a subfloor flexes under foot traffic or structural weight, the grout lines will crack and tiles will eventually loosen or snap.
- Checking Deflection Limits: Standard tile installations require a subfloor deflection rating of at least L/360, meaning the floor bends no more than 1/360th of its span under load. Heavy natural stone tiles like marble or slate demand an even stiffer rating of L/720.
- Adding Subfloor Layers: If the existing subfloor consists of a single layer of plywood or oriented strand board (OSB), installing a second layer of exterior-grade plywood adds necessary stiffness. Subfloor panels should be screwed down securely, avoiding alignment of seam joints between layers.
- Installing Underlayment: Tiling directly onto wood subfloors is not recommended because wood expands and contracts with humidity changes. Installing a cement backer board or an uncoupling membrane isolates the tile layer from wood movement, preventing stress cracks.
Taking time to create a flat, solid foundation eliminates movement and guarantees that the finished floor remains stable under daily use.
Waterproofing Wet Zones and Wall Substrates
Bathrooms are subjected to high levels of ambient humidity and direct water exposure, making proper moisture barriers a non-negotiable step in preparation. Drywall and standard green board absorb water, which leads to tile detachment, wall rot, and mold growth behind shower walls.
Shower enclosures and tub surrounds require waterproof cementitious backer units or high-density foam boards engineered for wet environments. Fastener heads and panel joints must be taped with alkali-resistant mesh tape and sealed with thin-set mortar. Following board installation, applying a liquid-applied waterproofing membrane or a sheet-applied waterproofing membrane across all wet areas seals the substrate completely.
In areas with complex layouts or historic building conditions, relying on experienced professionals for tile installation chicago guarantees that waterproofing layers comply with local building codes and effectively prevent moisture intrusion behind decorative tile surfaces.
Flatness, Priming, and Final Layout Planning
Even a structurally sound subfloor or wall can have subtle dips and humps that interfere with tile placement. Addressing surface irregularities before mixing tile mortar streamlines installation and prevents uneven edges between tiles.
Using a self-leveling underlayment compound on floor surfaces fills low spots and creates a level plane for setting tile. Before applying self-levelers or thin-set mortar, treating porous substrates with an appropriate primer improves bond strength and prevents moisture from being sucked out of the mortar too quickly.
Once the surfaces are flat and dry, performing a dry layout helps establish balance. Marking centerline grid lines across walls and floors allows installers to adjust layout cuts, ensuring that tile borders remain symmetrical and avoiding narrow, awkward tile slivers at corners and room edges.
Conclusion
Thorough substrate preparation is the true foundation of a successful bathroom tile project. By stripping old materials, reinforcing subfloors against deflection, building square wall assemblies, and applying complete waterproofing systems, homeowners eliminate the root causes of tile failure. Investing effort into these critical underlying steps ensures that new tile looks exceptional and performs reliably for years to come.